SM0486
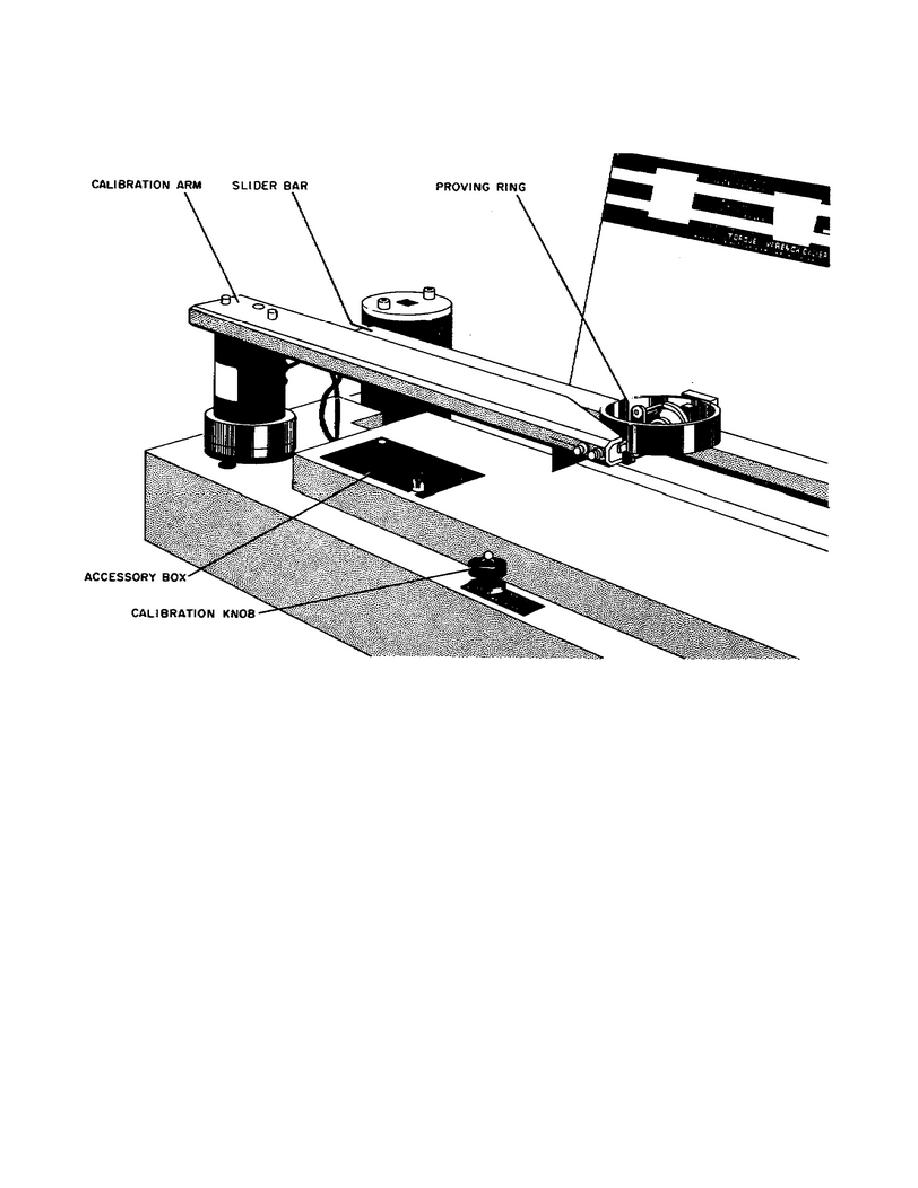
Figure 13.
Proving Ring Mounting
a. The proving ring is essentially a precision ring of spring steel that
compresses a given dimension when a given force is applied to it. The proving ring
if Figure 13 used a micrometer and a vibratory wand to measure the deformation of
the ring.
The wand is mounted on the micrometer; and as the micrometer is
adjusted, the vibrating wand moves closer or farther away from a metal block
(called the anvil) mounted on the opposite side of the proving ring.
As the
micrometer is adjusted, the vibrating action of the wand senses the exact point
where the wand first touches the anvil.
Two measurements are made with the
micrometer, one before force is applied to the ring and another after force is
applied to the ring. The difference in micrometer readings is the amount of ring
distortion produced by the force.
b. To relate the distortion of the proving ring to the amount of torque that
should be sensed by the torque cell, the length of the calibration arm must be
considered.
Table 3 lists the calibration lengths for different ranges of the
ranges of the torque wrench tester. As you can see from Table 3, the longer the
Calibration arm, the higher the torque range that can be calibrated.
100


 Previous Page
