Example:
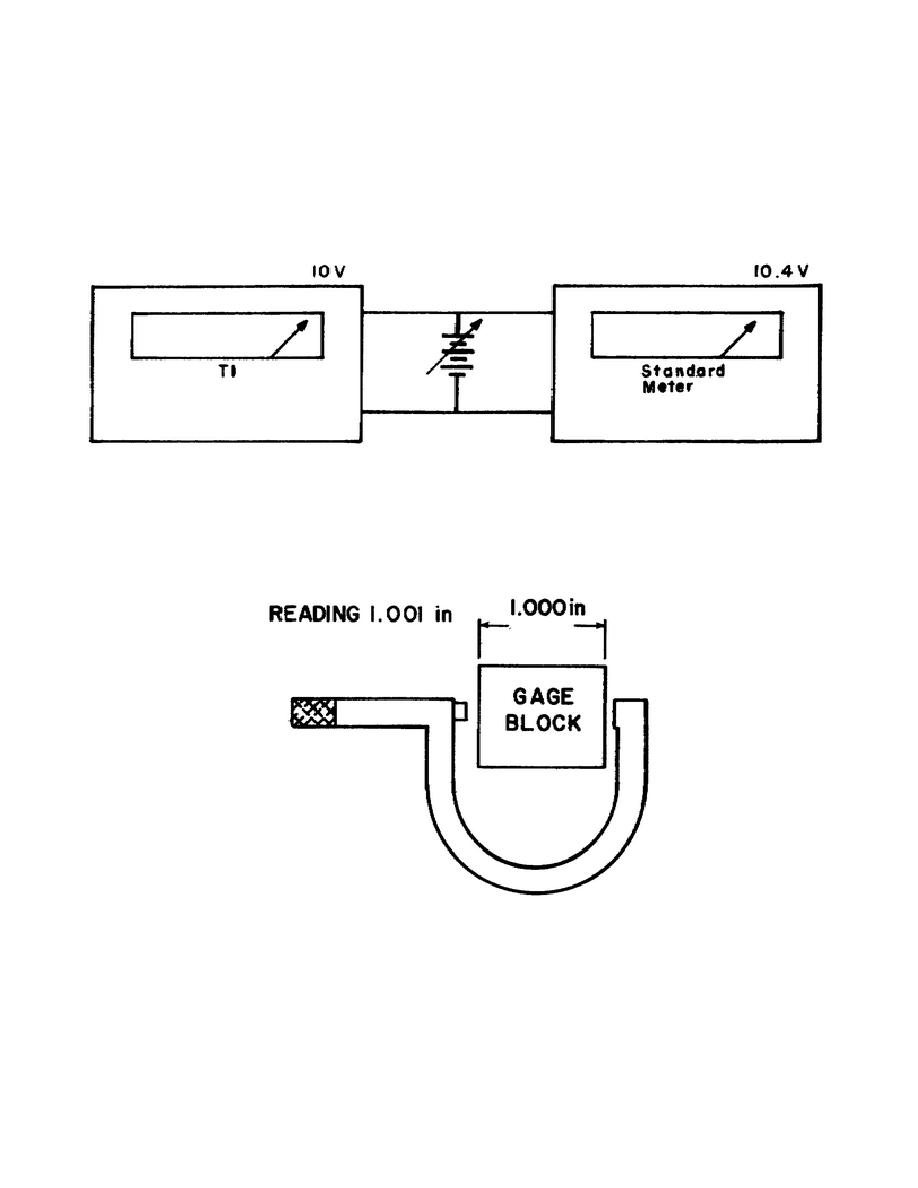
A 10 volt, full-scale voltmeter is calibrated at the full-scale
point (figure 8). The meter has a manufacturer's tolerance of 3% of FS. A
variable voltage source is connected to the meter (TI) and adjusted to cause
the TI to read exactly 10 volts. A standard meter is also connected to the
voltage source and reads the true value, 10.4 volts; therefore, r=10 volts,
a=0.4 volt, and e=4% of FS. The TI is out of the 3 percent tolerance and
requires adjustment.
Figure 8.
Out of Tolerance Condition
c. The alternate method is to set the standard to an exact value or use
a single-value standard.
The standard is monitored by the TI.
Error is
calculated as above, with the TI reading still considered r.
Figure 9.
Micrometer Measurement
A micrometer with A range of 0 to 1 inch is calibrated at full
scale (figure
9). A 1 inch gage block is used as a standard (consider the
block exactly
0.001 inch;
1.000 inch).
The allowable error tolerance of the TI is
therefore, the TI is within tolerance. The percentage error
of the TI was
0.001/1.001 x 100 or -0.099%.
162


 Previous Page
