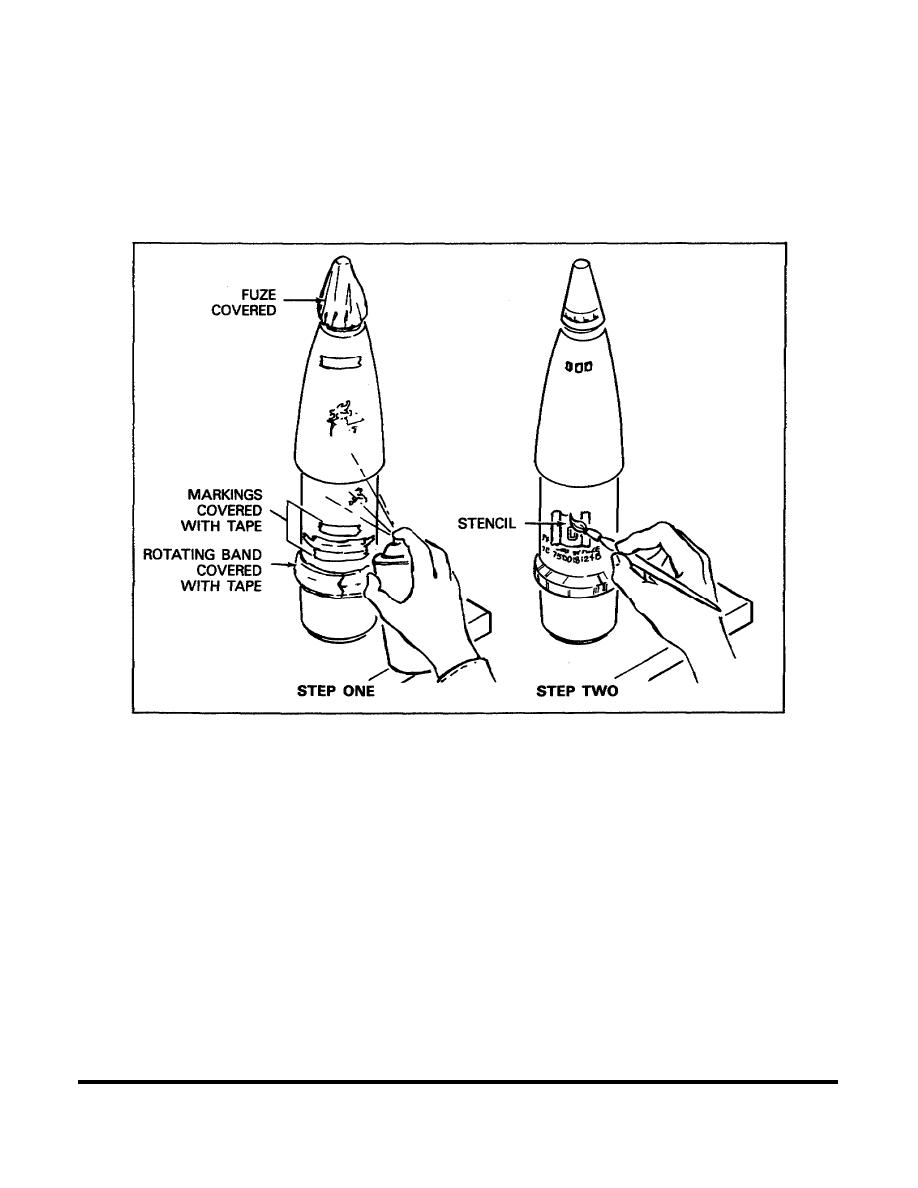
Check the paint or protective coating on the projectile for scratched, peeling, or blistering paint. If any of these
conditions are found, use a nonsparking wire brush to remove the damaged paint. To touch up the paint, use
masking tape to cover the legible markings and parts on the projectile that should not be painted, such as the
rotating band and the fuze or closing plug. See Figure 2-3. Spray or brush on a primer and allow it to dry. Follow
the primer with two coats of paint, allowing drying time between each coat. Generally, the original color of paint
will be used to repaint or remark the projectile. After the paint has dried, remove the tape and, if necessary, touch
up the markings that you covered.
Figure 2-3. Touching Up the Paint and Restenciling the Markings on a Projectile.
Normally, only touch-up of markings is necessary. To do this, make a stencil that contains only the required
information. Position the stencil on the projectile in the location to be marked. Apply a small amount of ink to the
ink plate. Then rub the brush in the ink to apply the ink to the bristles. While holding the stencil firmly against the
projectile (use masking tape if necessary), rub the bristles of the brush over the stencil. Remove the stencil and
check the markings to make sure that they are legible.
Inspect the base of the projectile for rust, corrosion, or cuts that have penetrated the base. Remove minor rust or
corrosion with sandpaper. If rust cannot be removed or if the base has been penetrated (see Figure 2-4), set the
round aside for disposal.
Inspect the markings on the bottom of the cartridge case (see Figure 2-5) to see if they are legible. If the
markings are stenciled, they can be touched up if necessary. If the markings are stamped by the manufacturer
and they are not legible, set the round aside for disposal.
15
MM2604


 Previous Page
