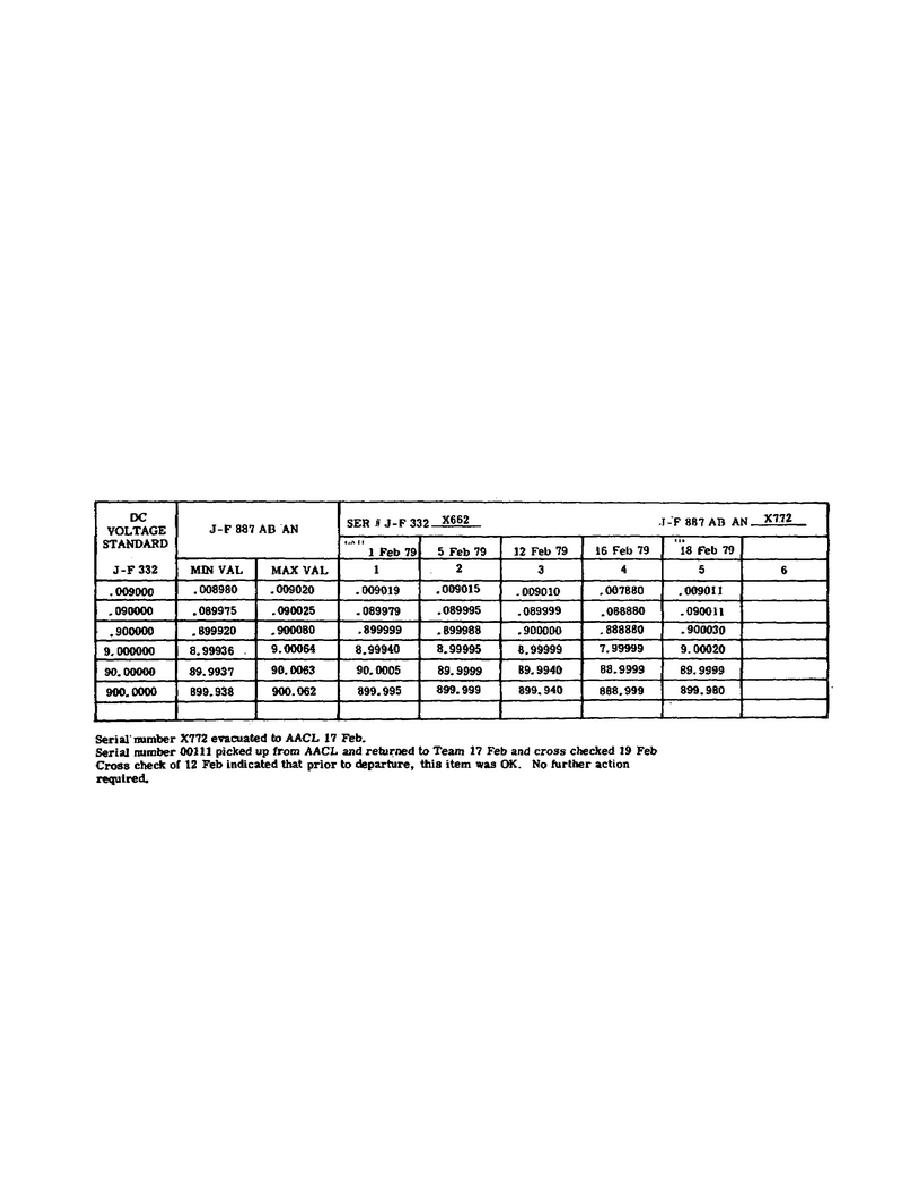
(2) Tables 3 thru 8 are examples of records that are maintained for
all cross-checks.
c. Table 3 is an example of a DC voltage standard cross-cheek. In this
case the DC voltage reference is the J-F 332 power supply, and the output
voltage as read on the J-F 887 AB/AN differential voltmeter.
The first
column in table 3 lists the specified reference voltages to be measured, and
the second and third columns list the minimum and maximum readings
(tolerated) for each voltage setting for these specific instruments.
In
most cases, the transfer team carries similar standards. By using similar
standards we can readily detect any deviations between standards.
We may
start with the DC voltage standard check by measuring the output with two
different voltmeters. The voltmeters should equally track for each voltage
measurement. However, if both meters read too high or too low, then we can
say that the DC voltage standard is out-of-tolerance or malfunctioning. On
the other hand, if one meter is tracking within tolerance but the other is
tracking too high or too low, we can say that the meter that is not tracking
within tolerance is at fault.
Table 3.
Tolerances for differential voltmeters
d. Referring to table 3, cross-check number one was performed on 1
February 1979 in the secondary reference laboratory prior to departing on
the cycle.
This first cross-check is very important to the calibration
technician because this is his only reference for future cross-checks. On 5
February 1979 the transfer team arrived at the first supported unit and
performed the second cross-check prior to commencing calibrating. You can
see that the second cross-check readings show a slight deviation from the
first cross-check, but the standards are still within tolerance.
183


 Previous Page
